
When doing things like switching a staging site over to production or changing the primary domain on your WordPress site, you'll likely need to perform a search and replace.
In this article, we'll show you a few different ways to perform a search and replace on your WordPress site's database.
Warning: Always remember to create a backup before making any permanent changes to your database!
Search and Replace with WP-CLI (Recommended)
The ideal way to perform a search and replace on your WordPress site's database is using the WP-CLI search-replace command. It's far more reliable and quicker than using other methods, such as using a WordPress plugin.
To perform a search and replace on your WordPress database, follow these steps:
- First, log into your WordPress site via SSH.
- Next, access the root directory of the site that you want to perform the search and replace on:
cd ~/sites/example.com
- Before making any changes, let's perform the search and replace using the --dry-run option. For example, if you're trying to change the domain on your site from old.example.com to new.example.com, the command would look like this:
wp search-replace 'old.example.com' 'new.example.com' --dry-run
After running the command, you should get a message like this:Success: 8 replacements to be made.
Note: Your output might show significantly more replacements that will need to be made. That's completely fine. The example message above is just for a fresh WordPress installation, which will have far fewer references to the site's domain than an existing site. - If everything looks right, you're ready to make permanent changes. Simply use the same command as you did in the last step, but with the --dry-run option omitted:
wp search-replace 'old.example.com' 'new.example.com'
That's all there is to it! Don't forget to test your site to make sure everything is working as it should!
Search and Replace with a WordPress Plugin
If you're unable to perform a search and replace on your database using WP-CLI, you can do so by using a WordPress plugin instead.
While the recommended plugin is very well made and this method works for a majority of sites, please keep in mind that this method isn't always as reliable as performing a search and replace with WP-CLI and individual results may vary.
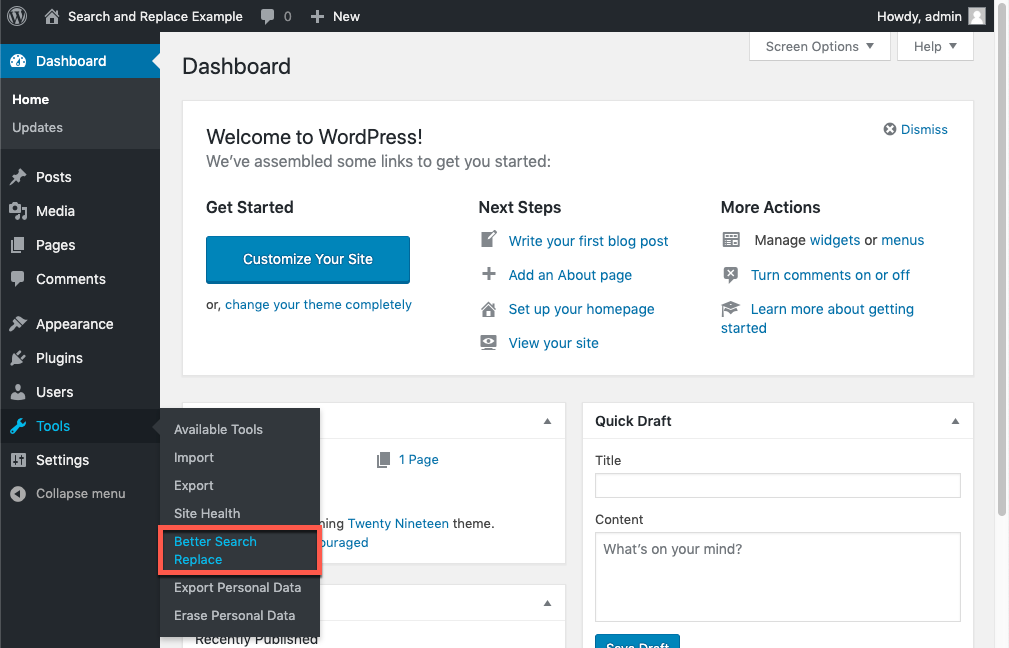
- Begin by logging into your WordPress site and installing the Better Search Replace plugin by Delicious Brains.
- On the left side menu in your WordPress admin, hover over Tools, then click on Better Search Replace.
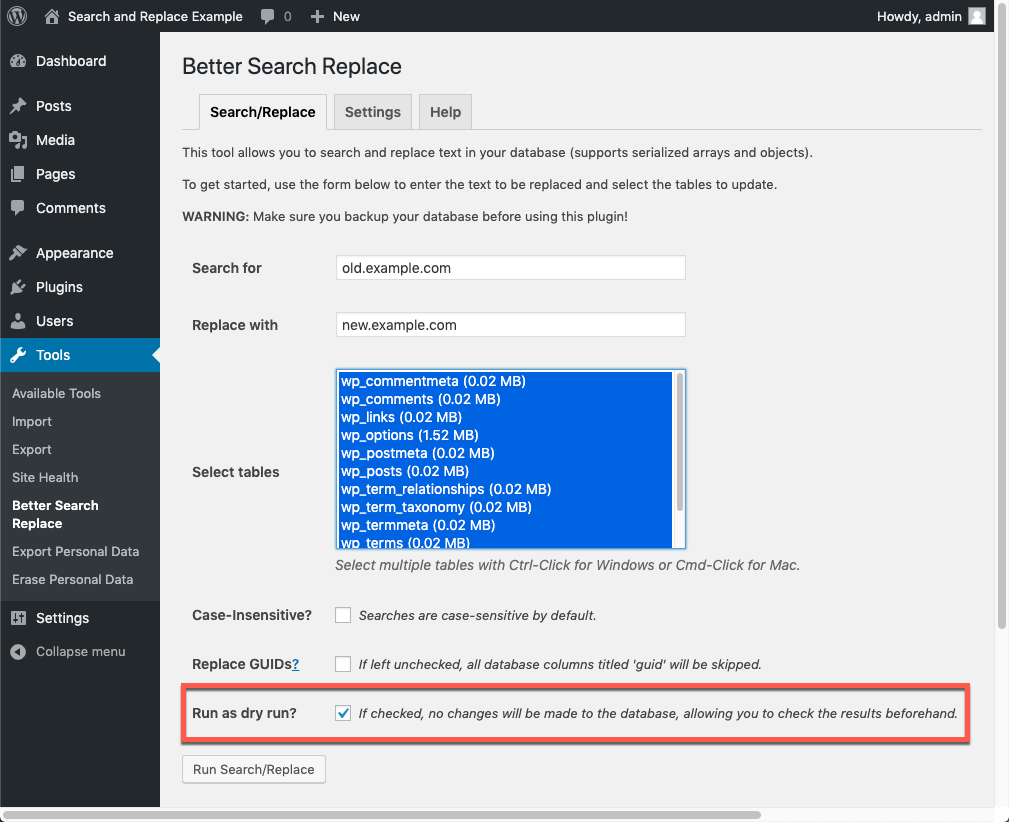
- From within the Better Search Replace page, the first field you'll need to enter is the Search For field, which will contain the content that you'll be searching for.
In this example, we want to change our primary domain from old.example.com to new.example.com, which makes our field content look like this: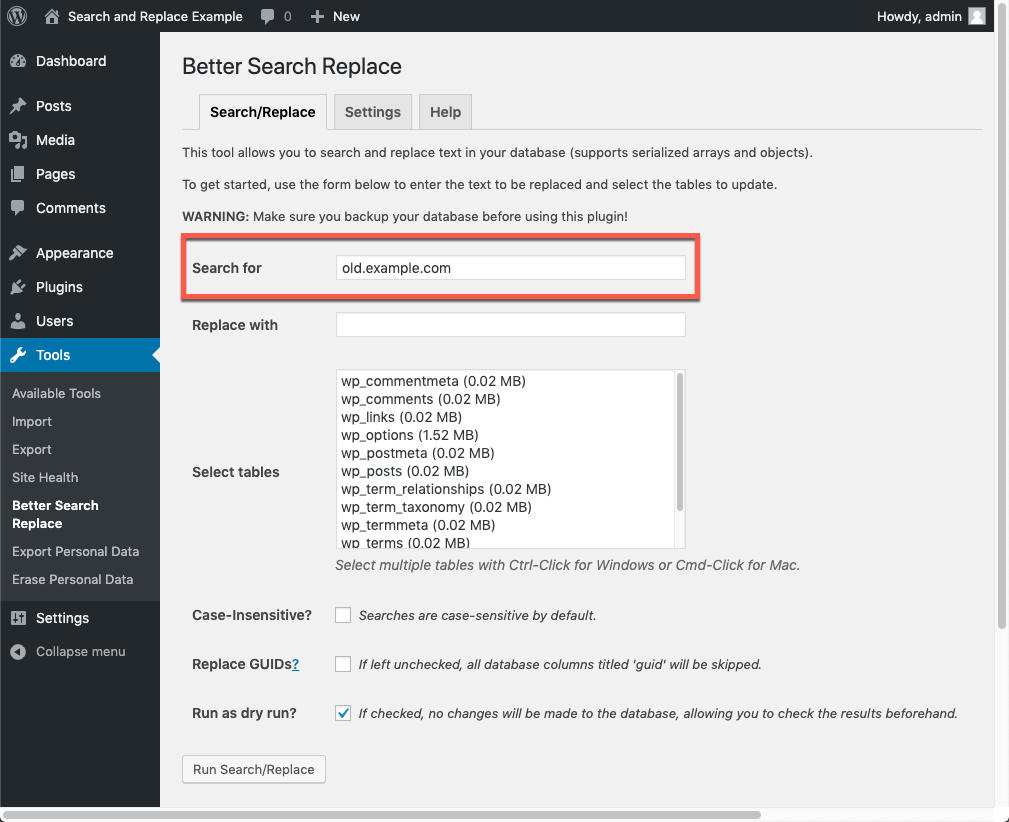
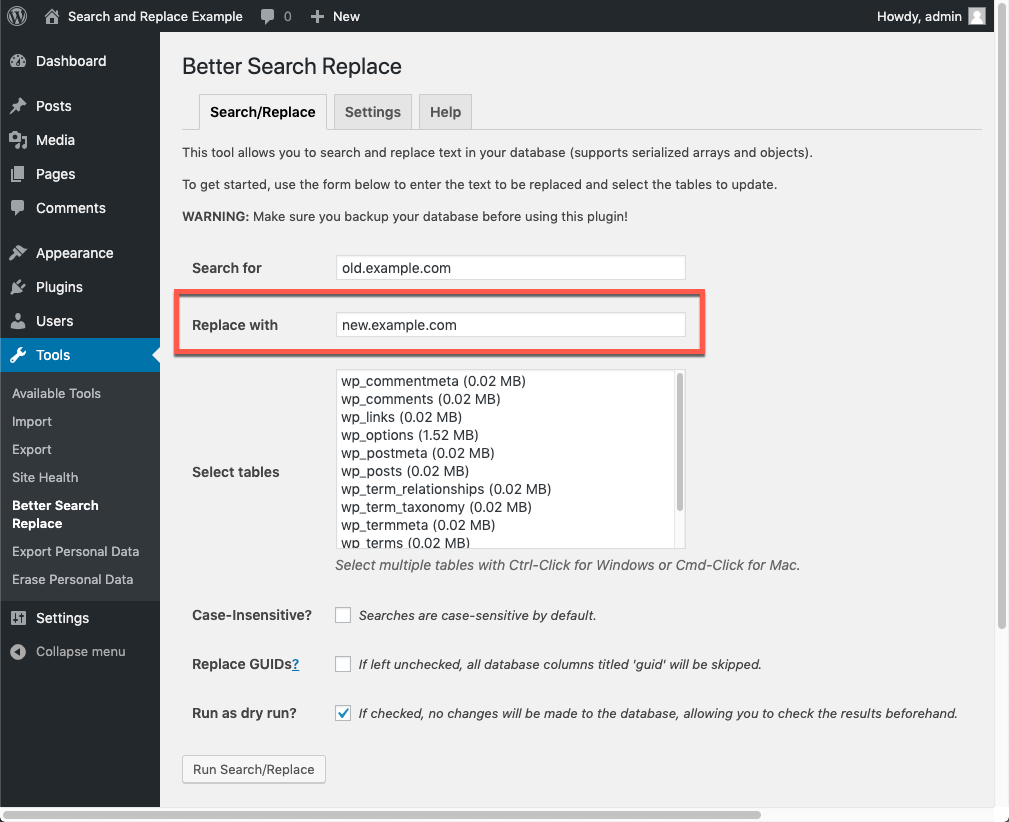
- Next, enter the replacement content into the Replace With field like this:
- The Better Search Replace plugin also needs to know what database tables to perform the replacement on. Inside the Select Tables option, select all of the tables that you want to search through.
In this example, we're changing the primary domain on the site, so we've selected every table in the database: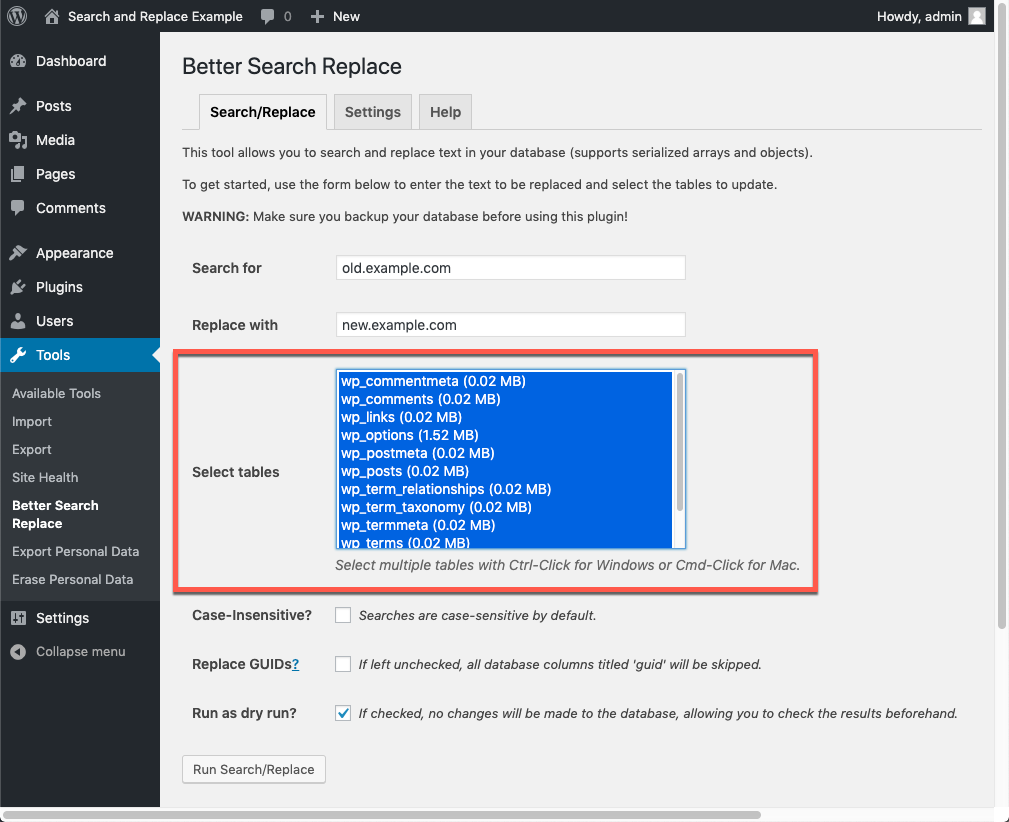
- It's always a good idea to test any database operations before making permanent changes. To see how the search and replace will go without changing anything in the database, enable the Run as Dry Run option.
- To test the search and replace, click the Run Search/Replace button. If everything went well, you'll receive a success message like this:
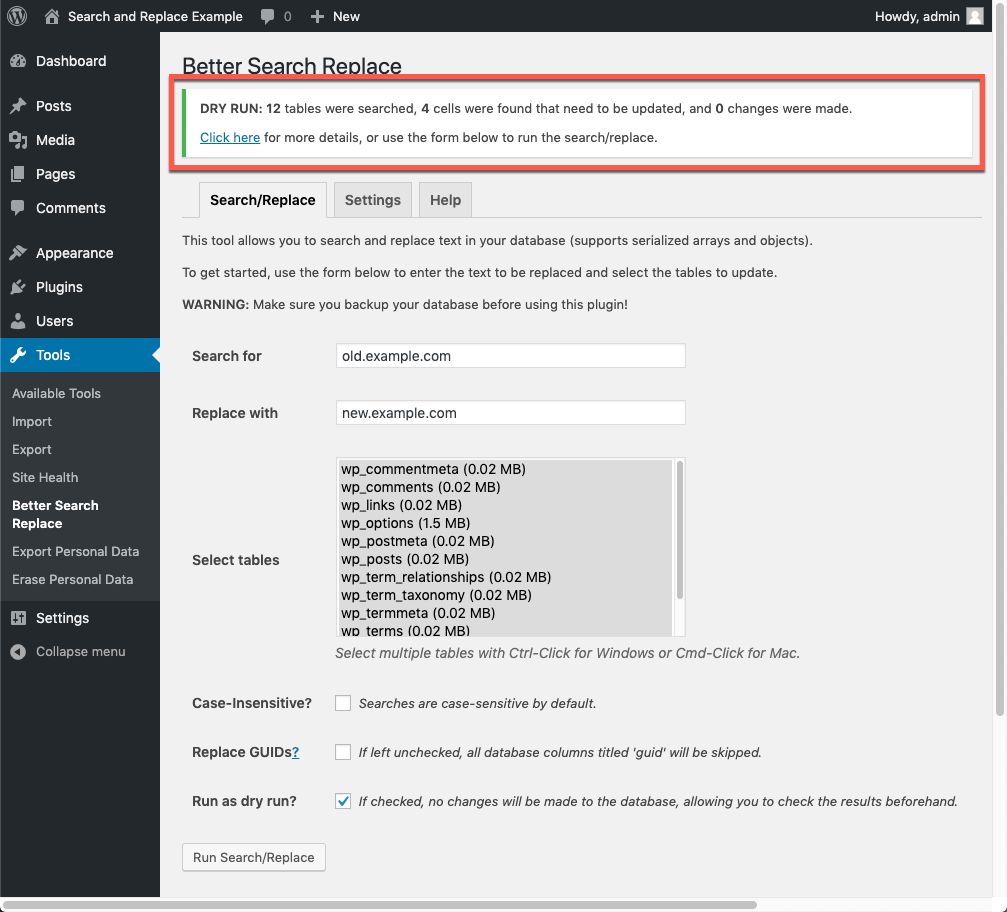
- If everything went well, all you need to do now is uncheck the Run as Dry Run button, then click the Run Search/Replace button to perform the search and replace on your WordPress database!
That's all there is to it! After the search and replace completes, don't forget to check over your site to make sure that everything is as you expect it to be!