
To use your own Amazon S3 bucket to store your WordPress assets with Press3, you'll need to first configure your bucket with certain access policies. In this article, we'll show you how to configure an S3 bucket access policy.
Note: This article assumes that you've already created an Amazon S3 bucket that you'll be setting a bucket permissions policy on. If you haven't already done so, you might want to take a look at our article on creating an Amazon S3 bucket.
-
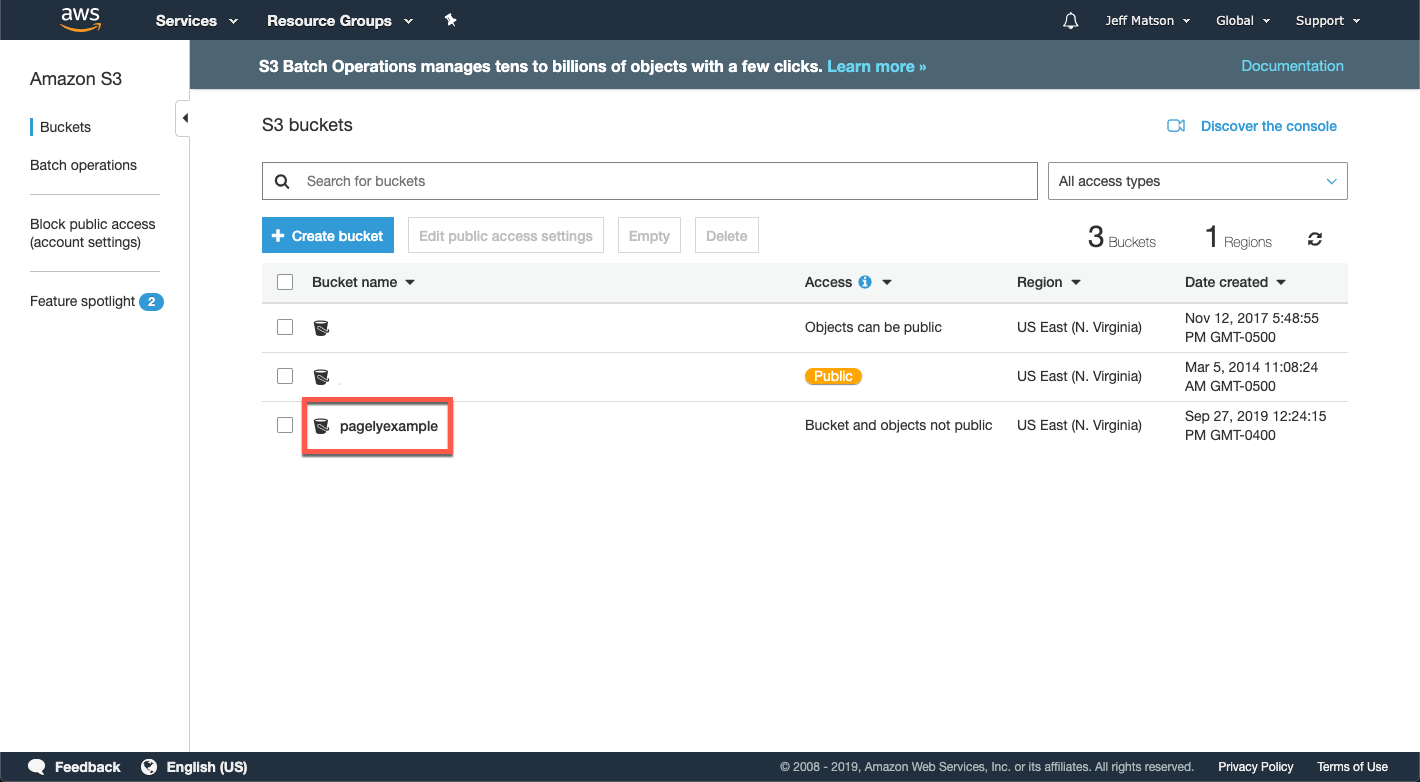
From the Amazon S3 bucket listing page, click on the name of your bucket that you want to use.
-
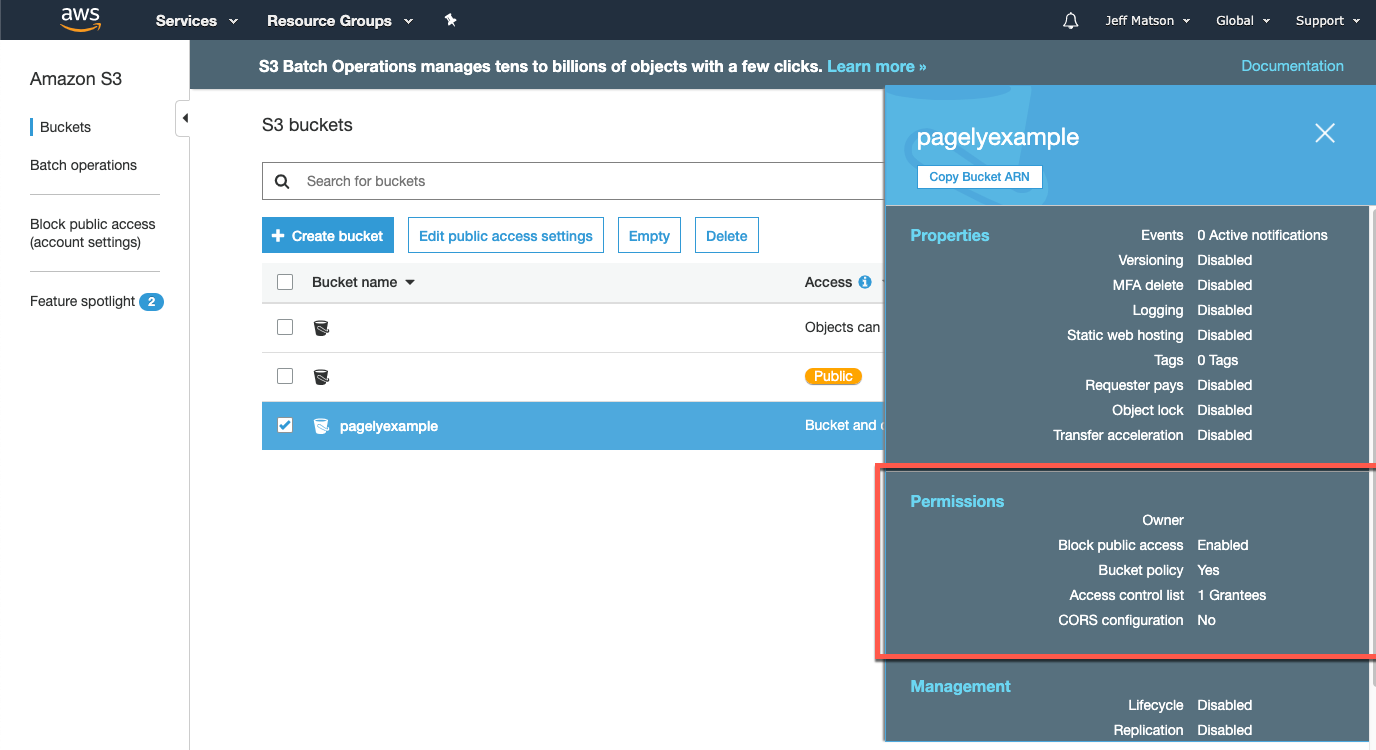
On the menu that opens to the left side of the page, click on Permissions.
-
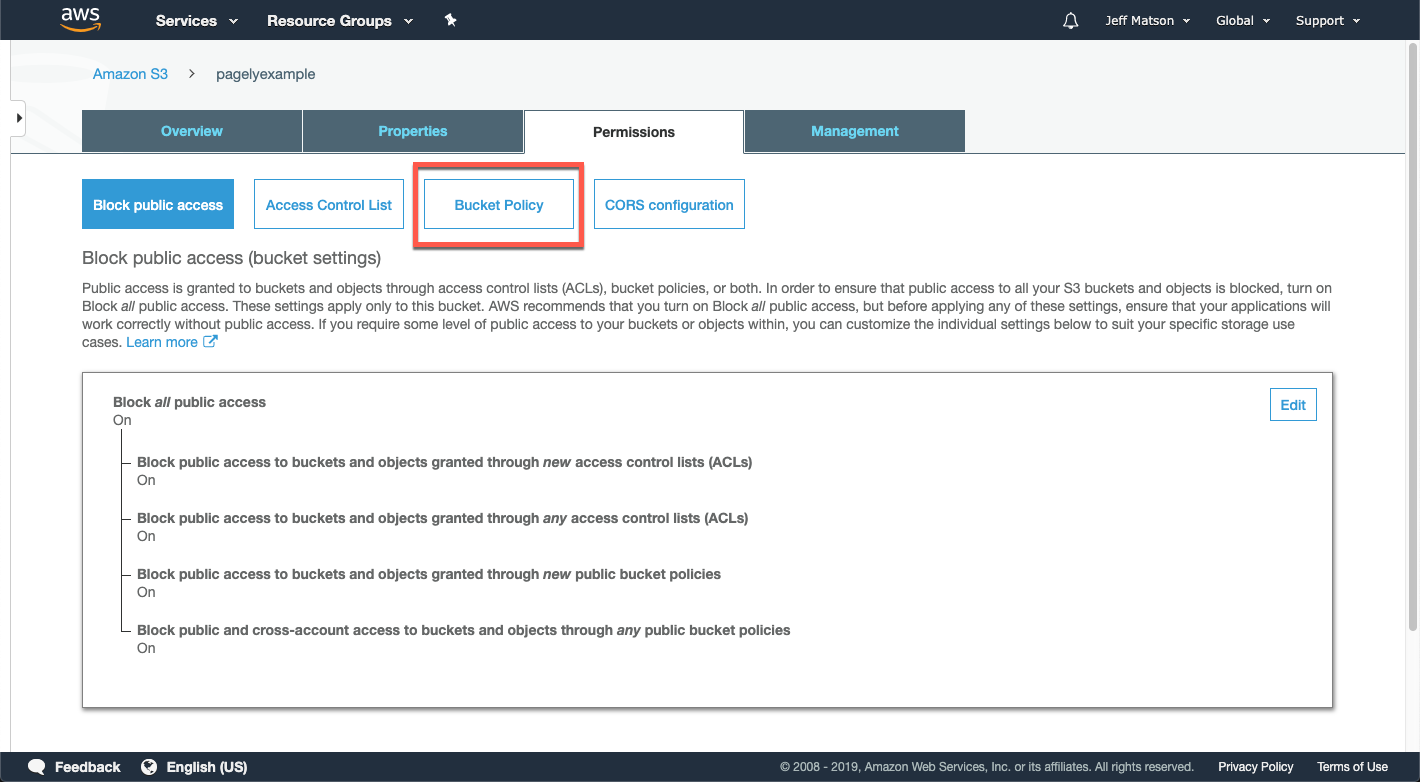
Next, click on Bucket Policy to access the bucket’s access policy editor.
-
Inside the bucket policy editor, insert the following rules, replacing BUCKET_NAME and VPS_IP with the name of your bucket and IP of your Pagely VPS. You can determine your VPS IP by going into Atomic, navigating to Apps and selecting one of your apps, then clicking the "Show More" button to see "External IP":
{
  "Version": "2012-10-17",
  "Statement": [
    {
      "Sid": "AllowObject0",
      "Effect": "Allow",
      "Principal": "*",
      "Action": [
        "s3:GetObject"
      ],
      "Resource": "arn:aws:s3:::REPLACE_WITH_YOUR_BUCKET_NAME/*",
      "Condition": {
        "IpAddress": {
          "aws:SourceIp": "REPLACE_WITH_VPS_IP/32"
        }
      }
    }
  ]
}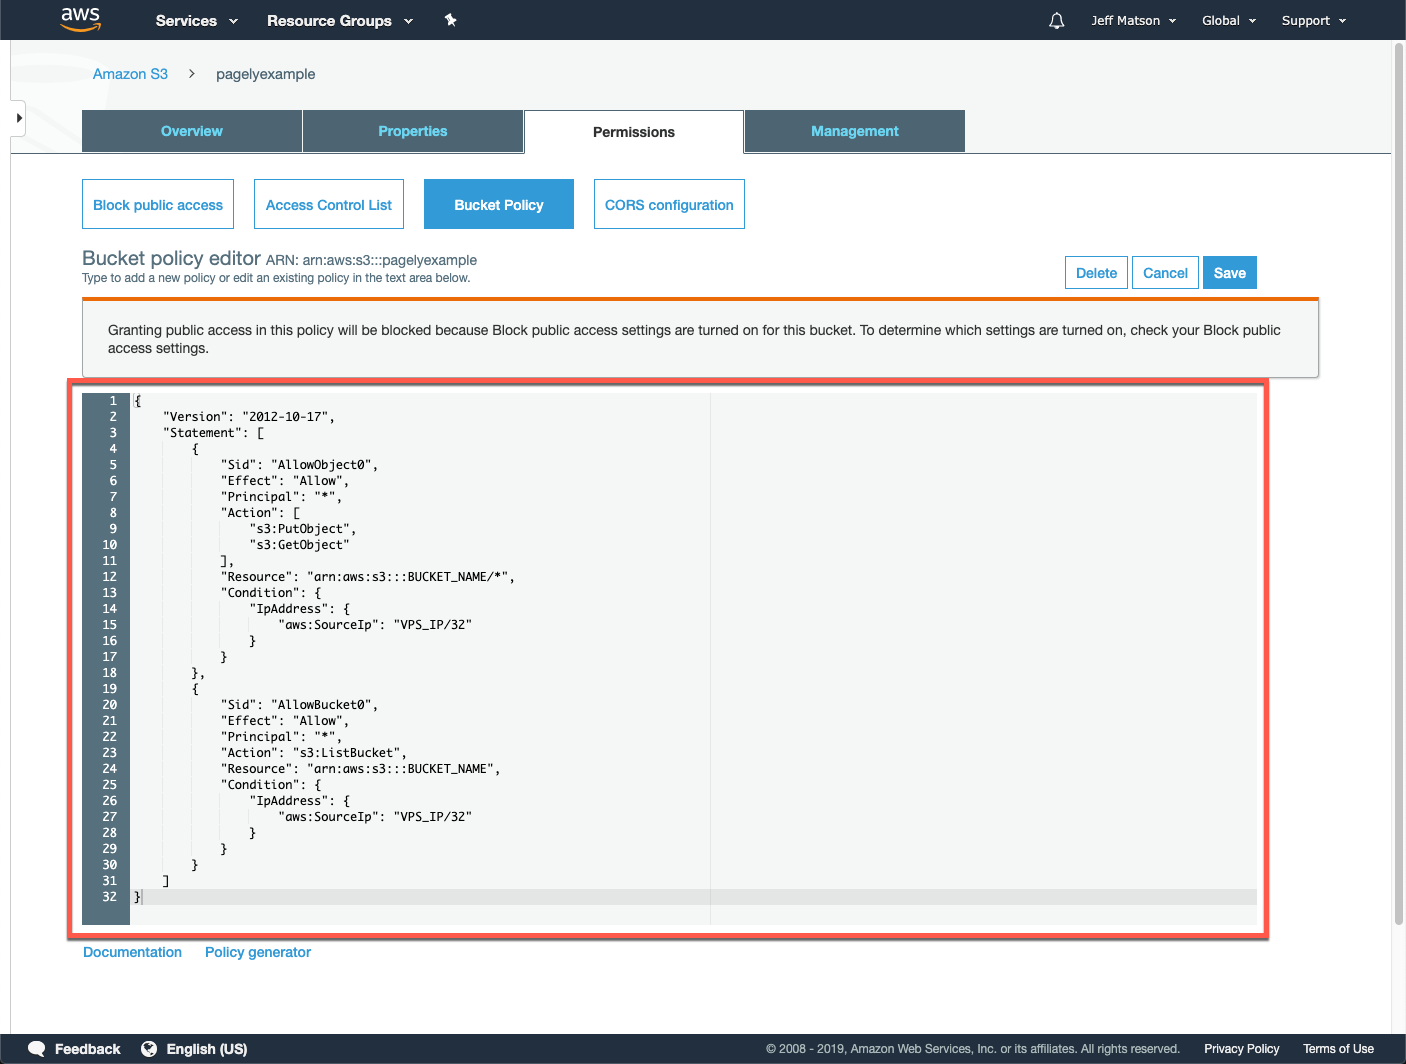
If you have an HA plan: The IP of both nodes must be specified. In this case, the "Condition" blocks would look like this instead:
"Condition": { "IpAddress": { "aws:SourceIp": [ "VPS_IP_1/32", "VPS_IP_2/32" ] } } -
Once your rule is in place, click the Save button to save your bucket policy.
Congratulations! Your Amazon S3 bucket now has the required permissions for using it with Press3 to store your static WordPress content.
If you haven't yet configured a user that will be used to access the S3 bucket with Press3, you'll likely want to take a look at our article on creating S3 user access policies for more information.