
At Pagely, we want to make sure you're up and running as smoothly as possible. After all, we do have a reputation of being the managed WordPress host of choice for enterprise-level managed hosting.
In this getting started guide, we'll outline the major points that will help you hit the ground running on our managed WordPress hosting platform.
Initial Steps
Welcome Email
When getting started, you'll receive an email containing instructions on creating an account within Pagely's Atomic control panel.
For further information on this welcome email and creating an Atomic account, see our article on logging into Atomic.
Atomic Basics
Once you're inside Atomic, let's look at a brief overview of where things are located.
Team
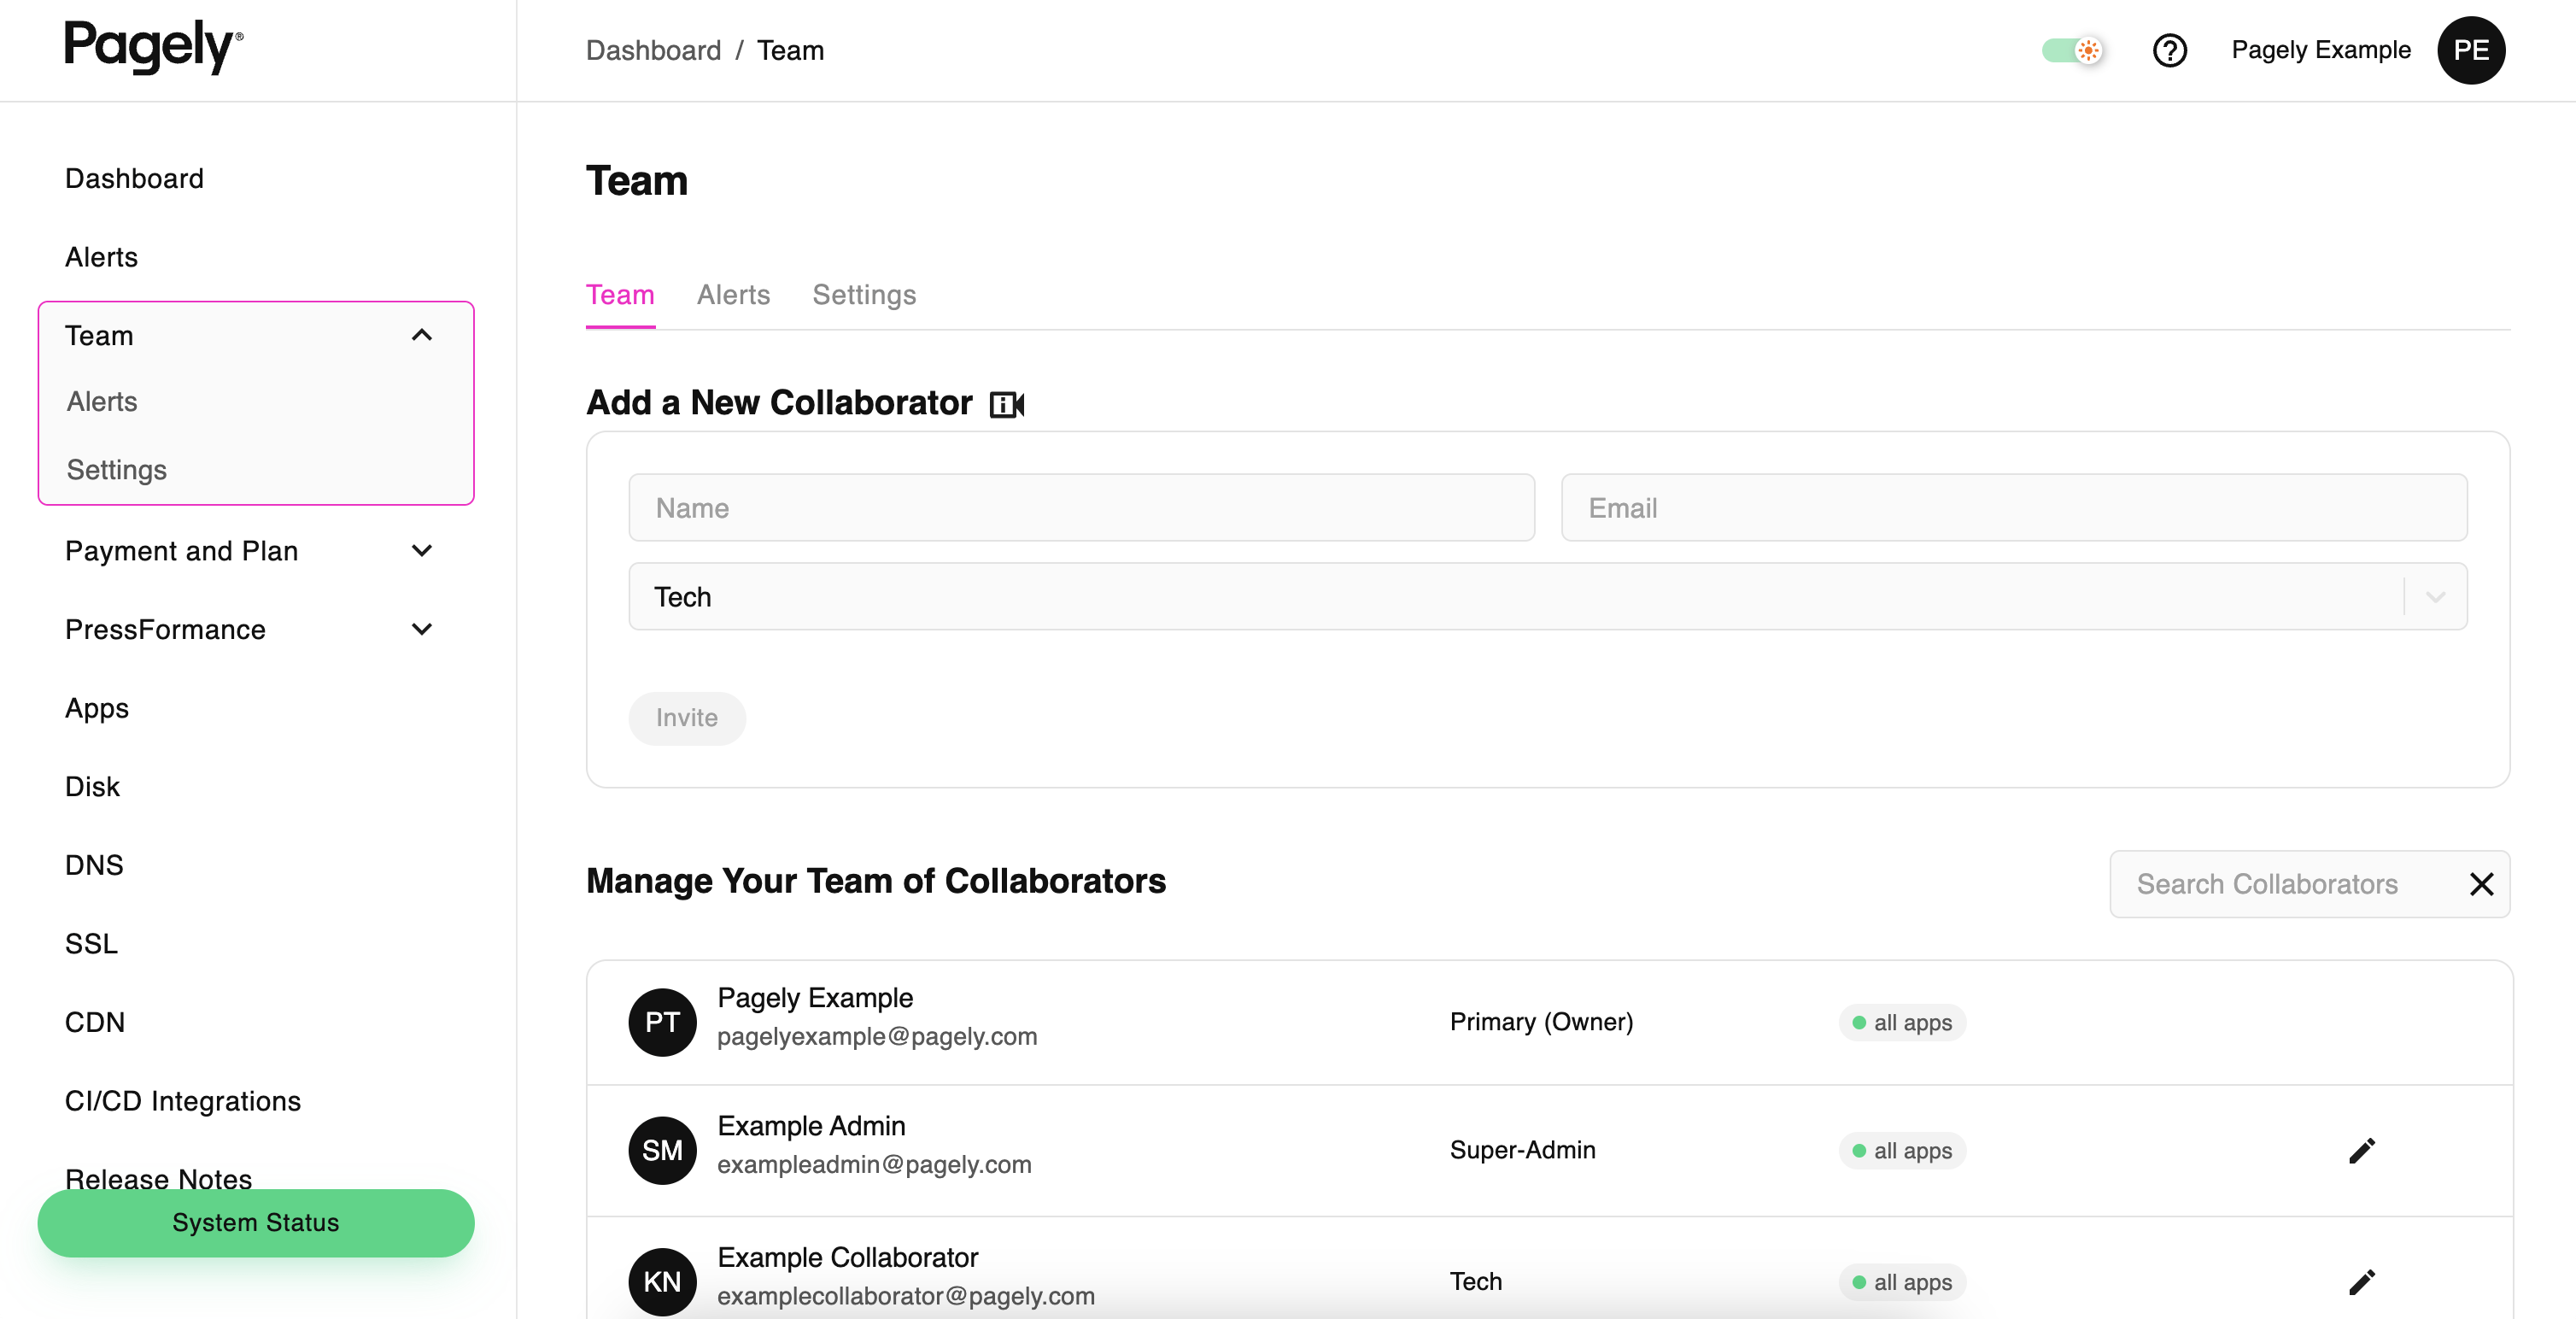
Inside this section, you'll manage team members, typically referred to as collaborators.
Managing various users as collaborators allows multiple users to all have access to your account using their own username/password, but with various permissions depending on their needs.
Payment and Plan
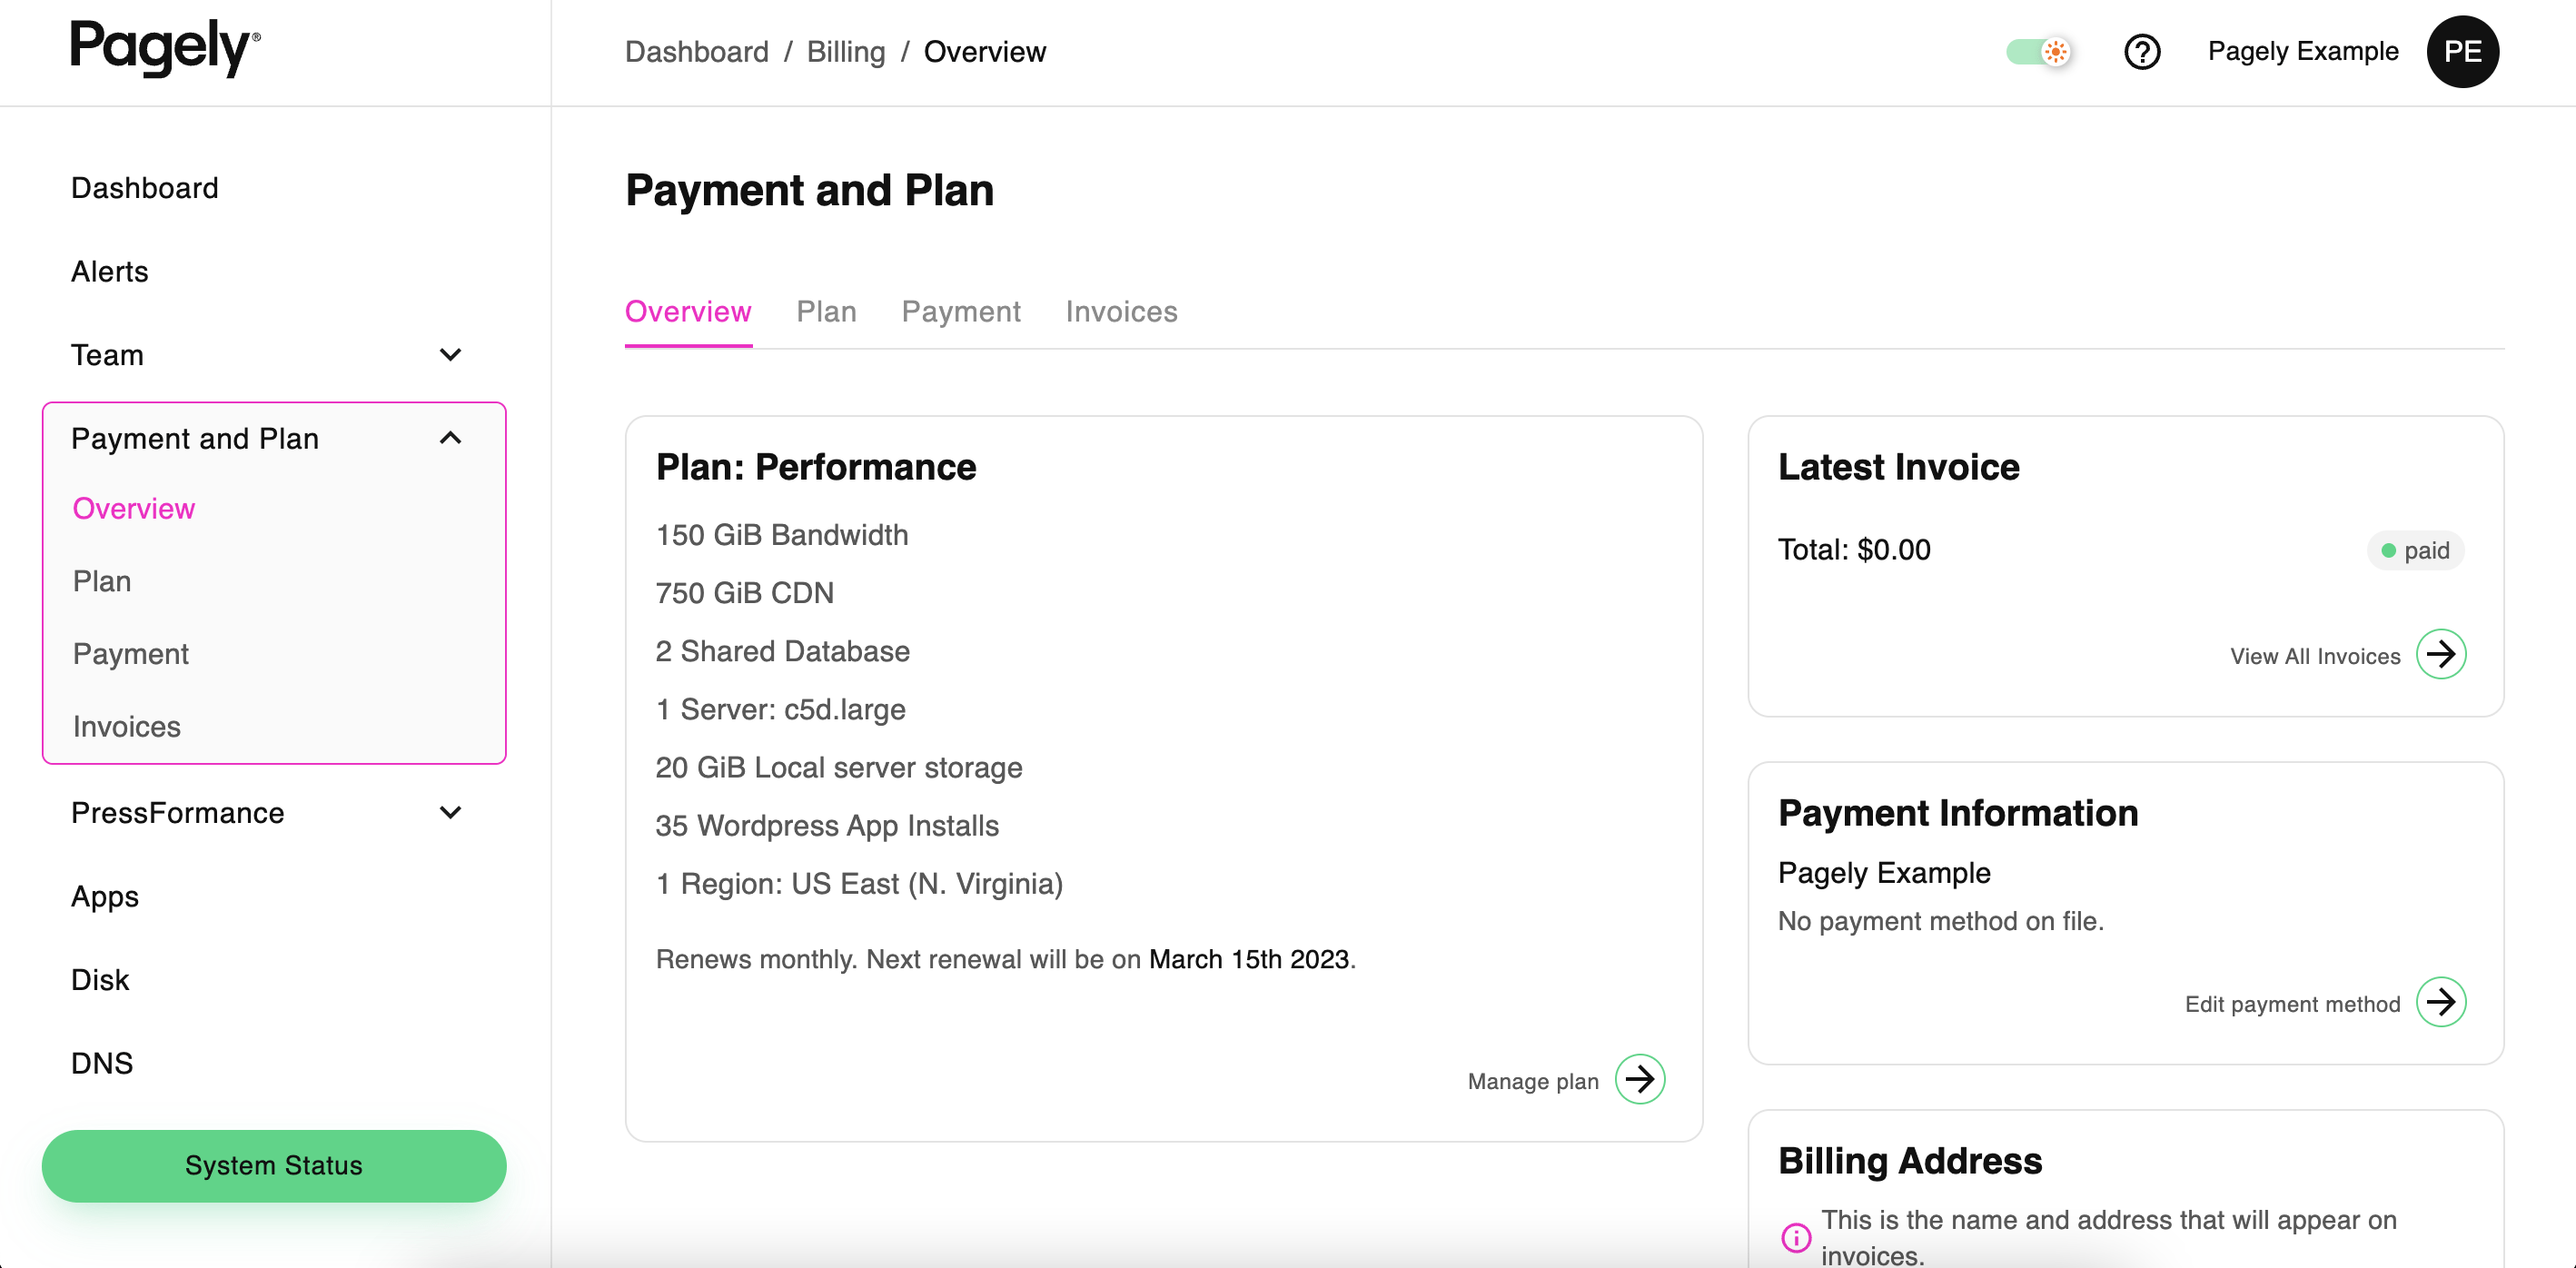
Within the Payment and Plan section, you'll manage things like billing and payment details.
If you need to change your payment method, view invoices, or change your plan, this is where you would do it.
Pressformance
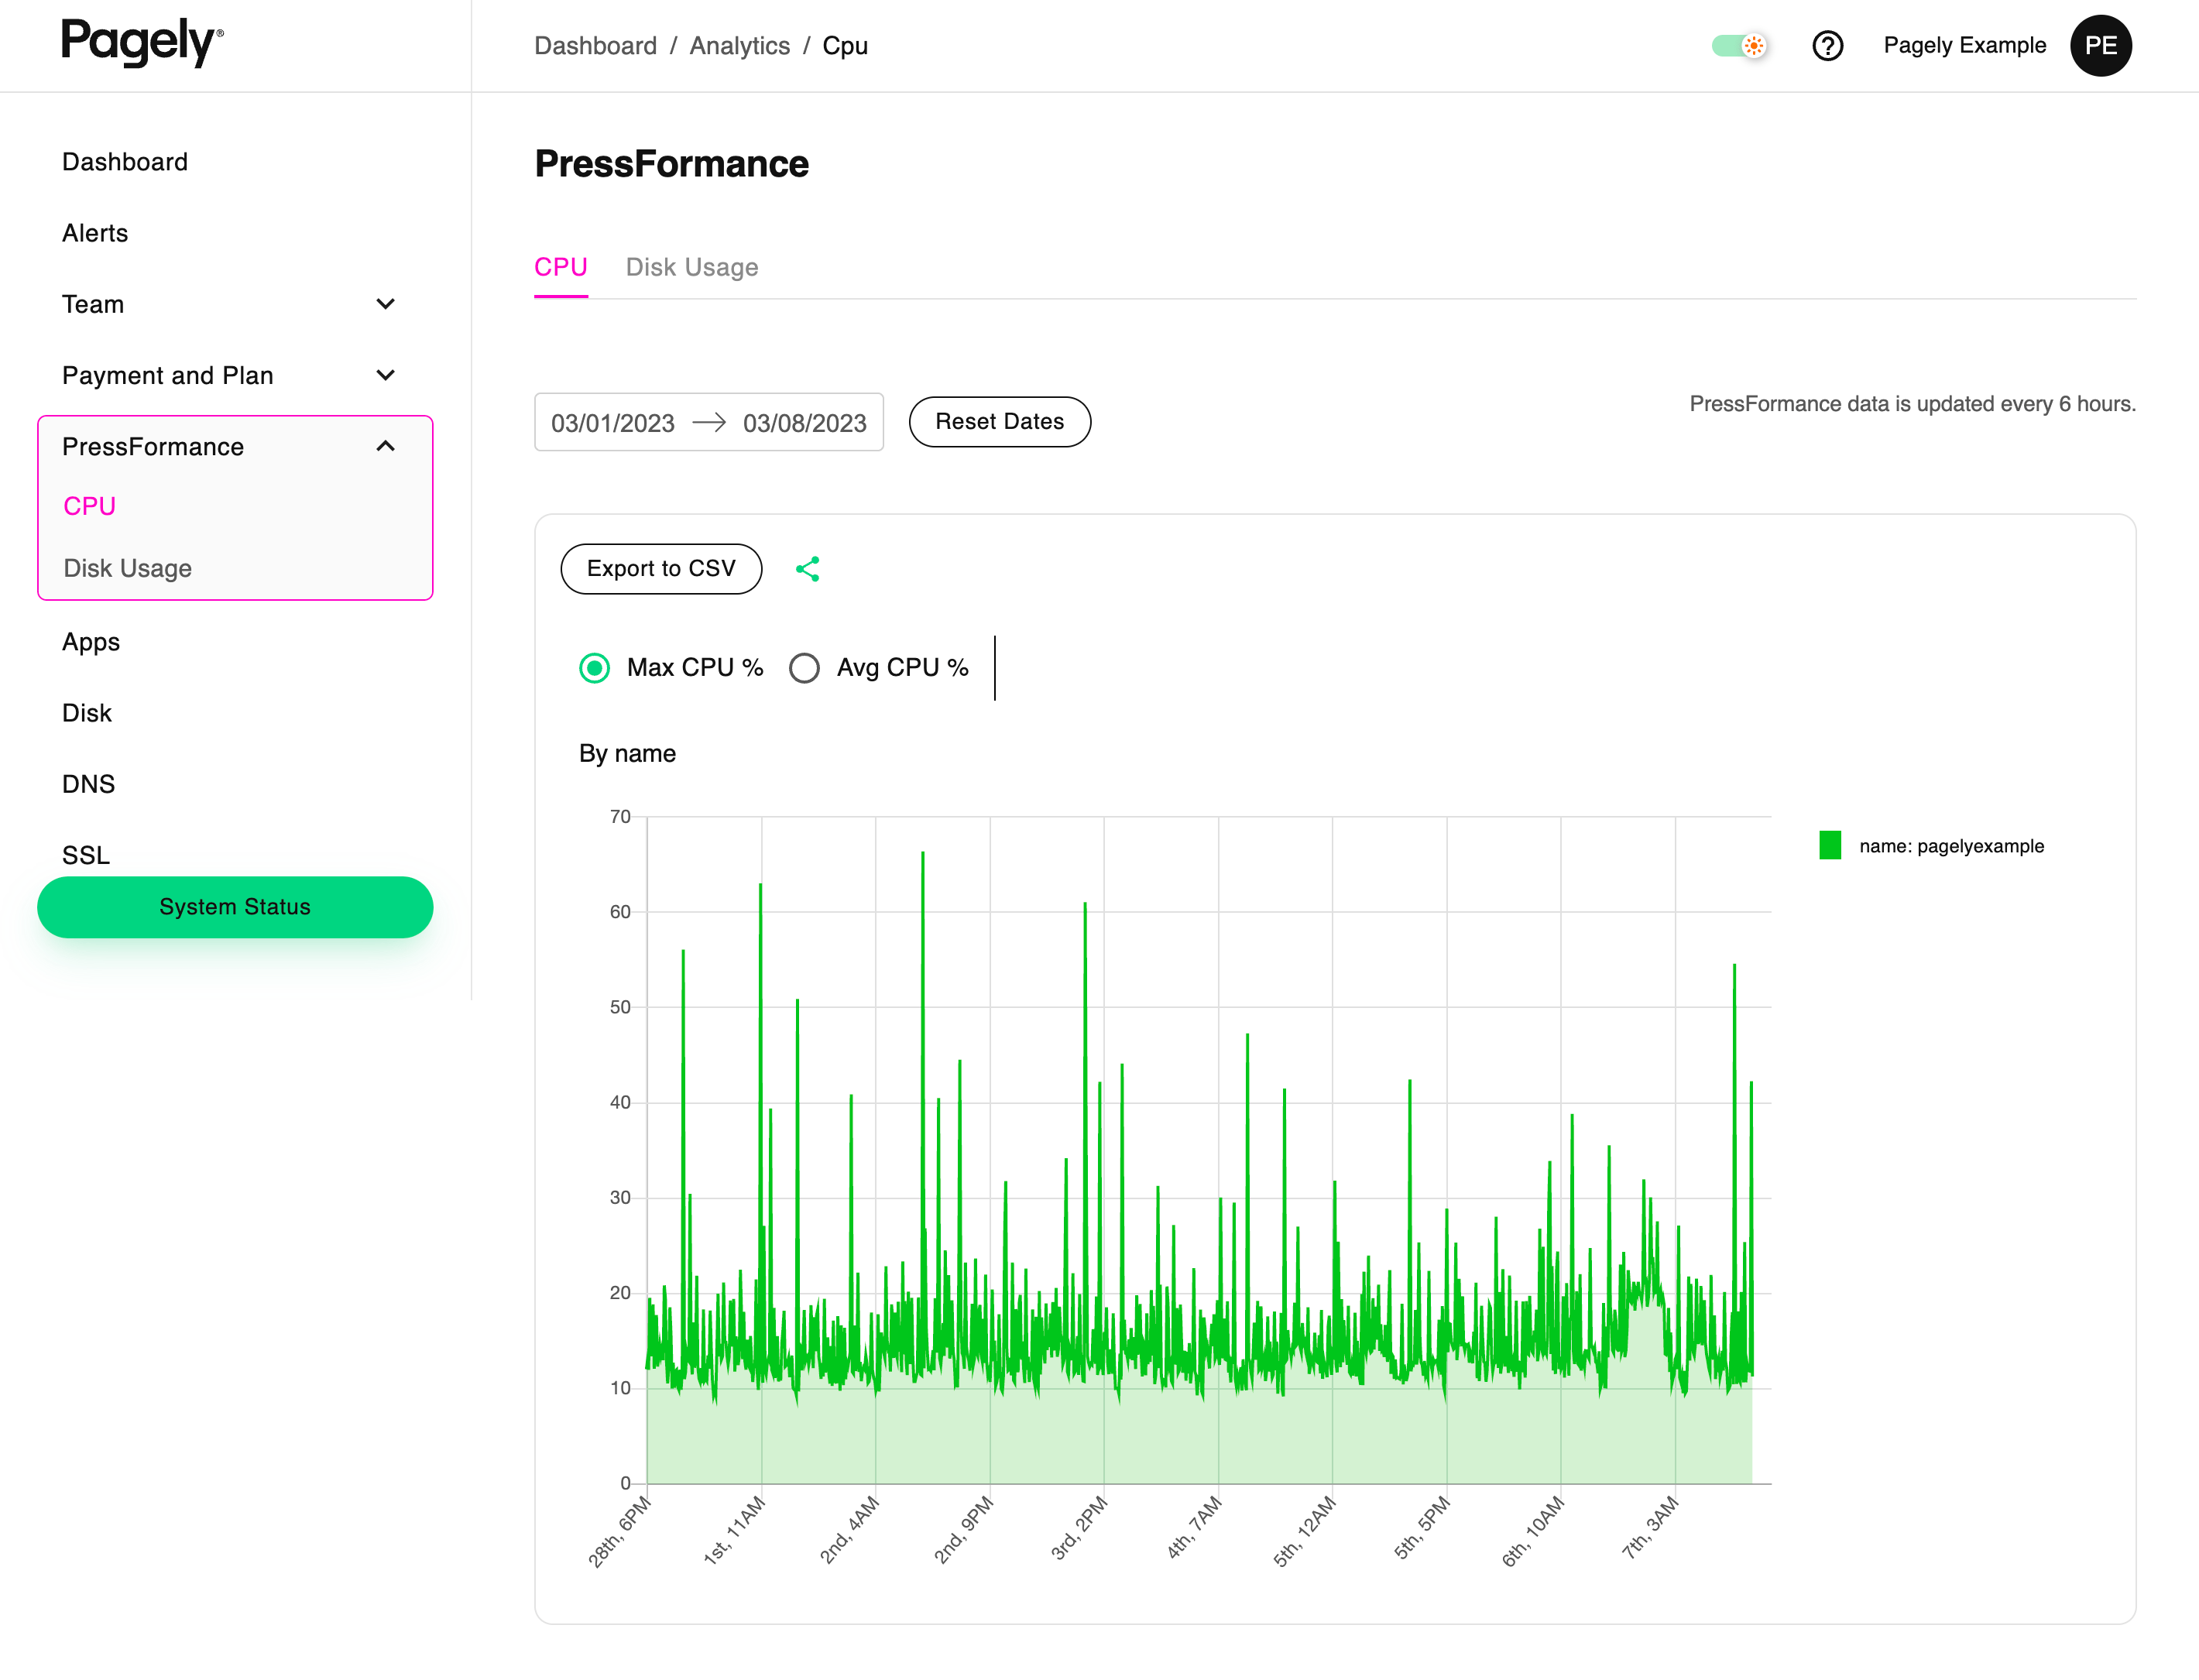
The Pressformance section shows information on how you WordPress app is performing on the server.
Apps
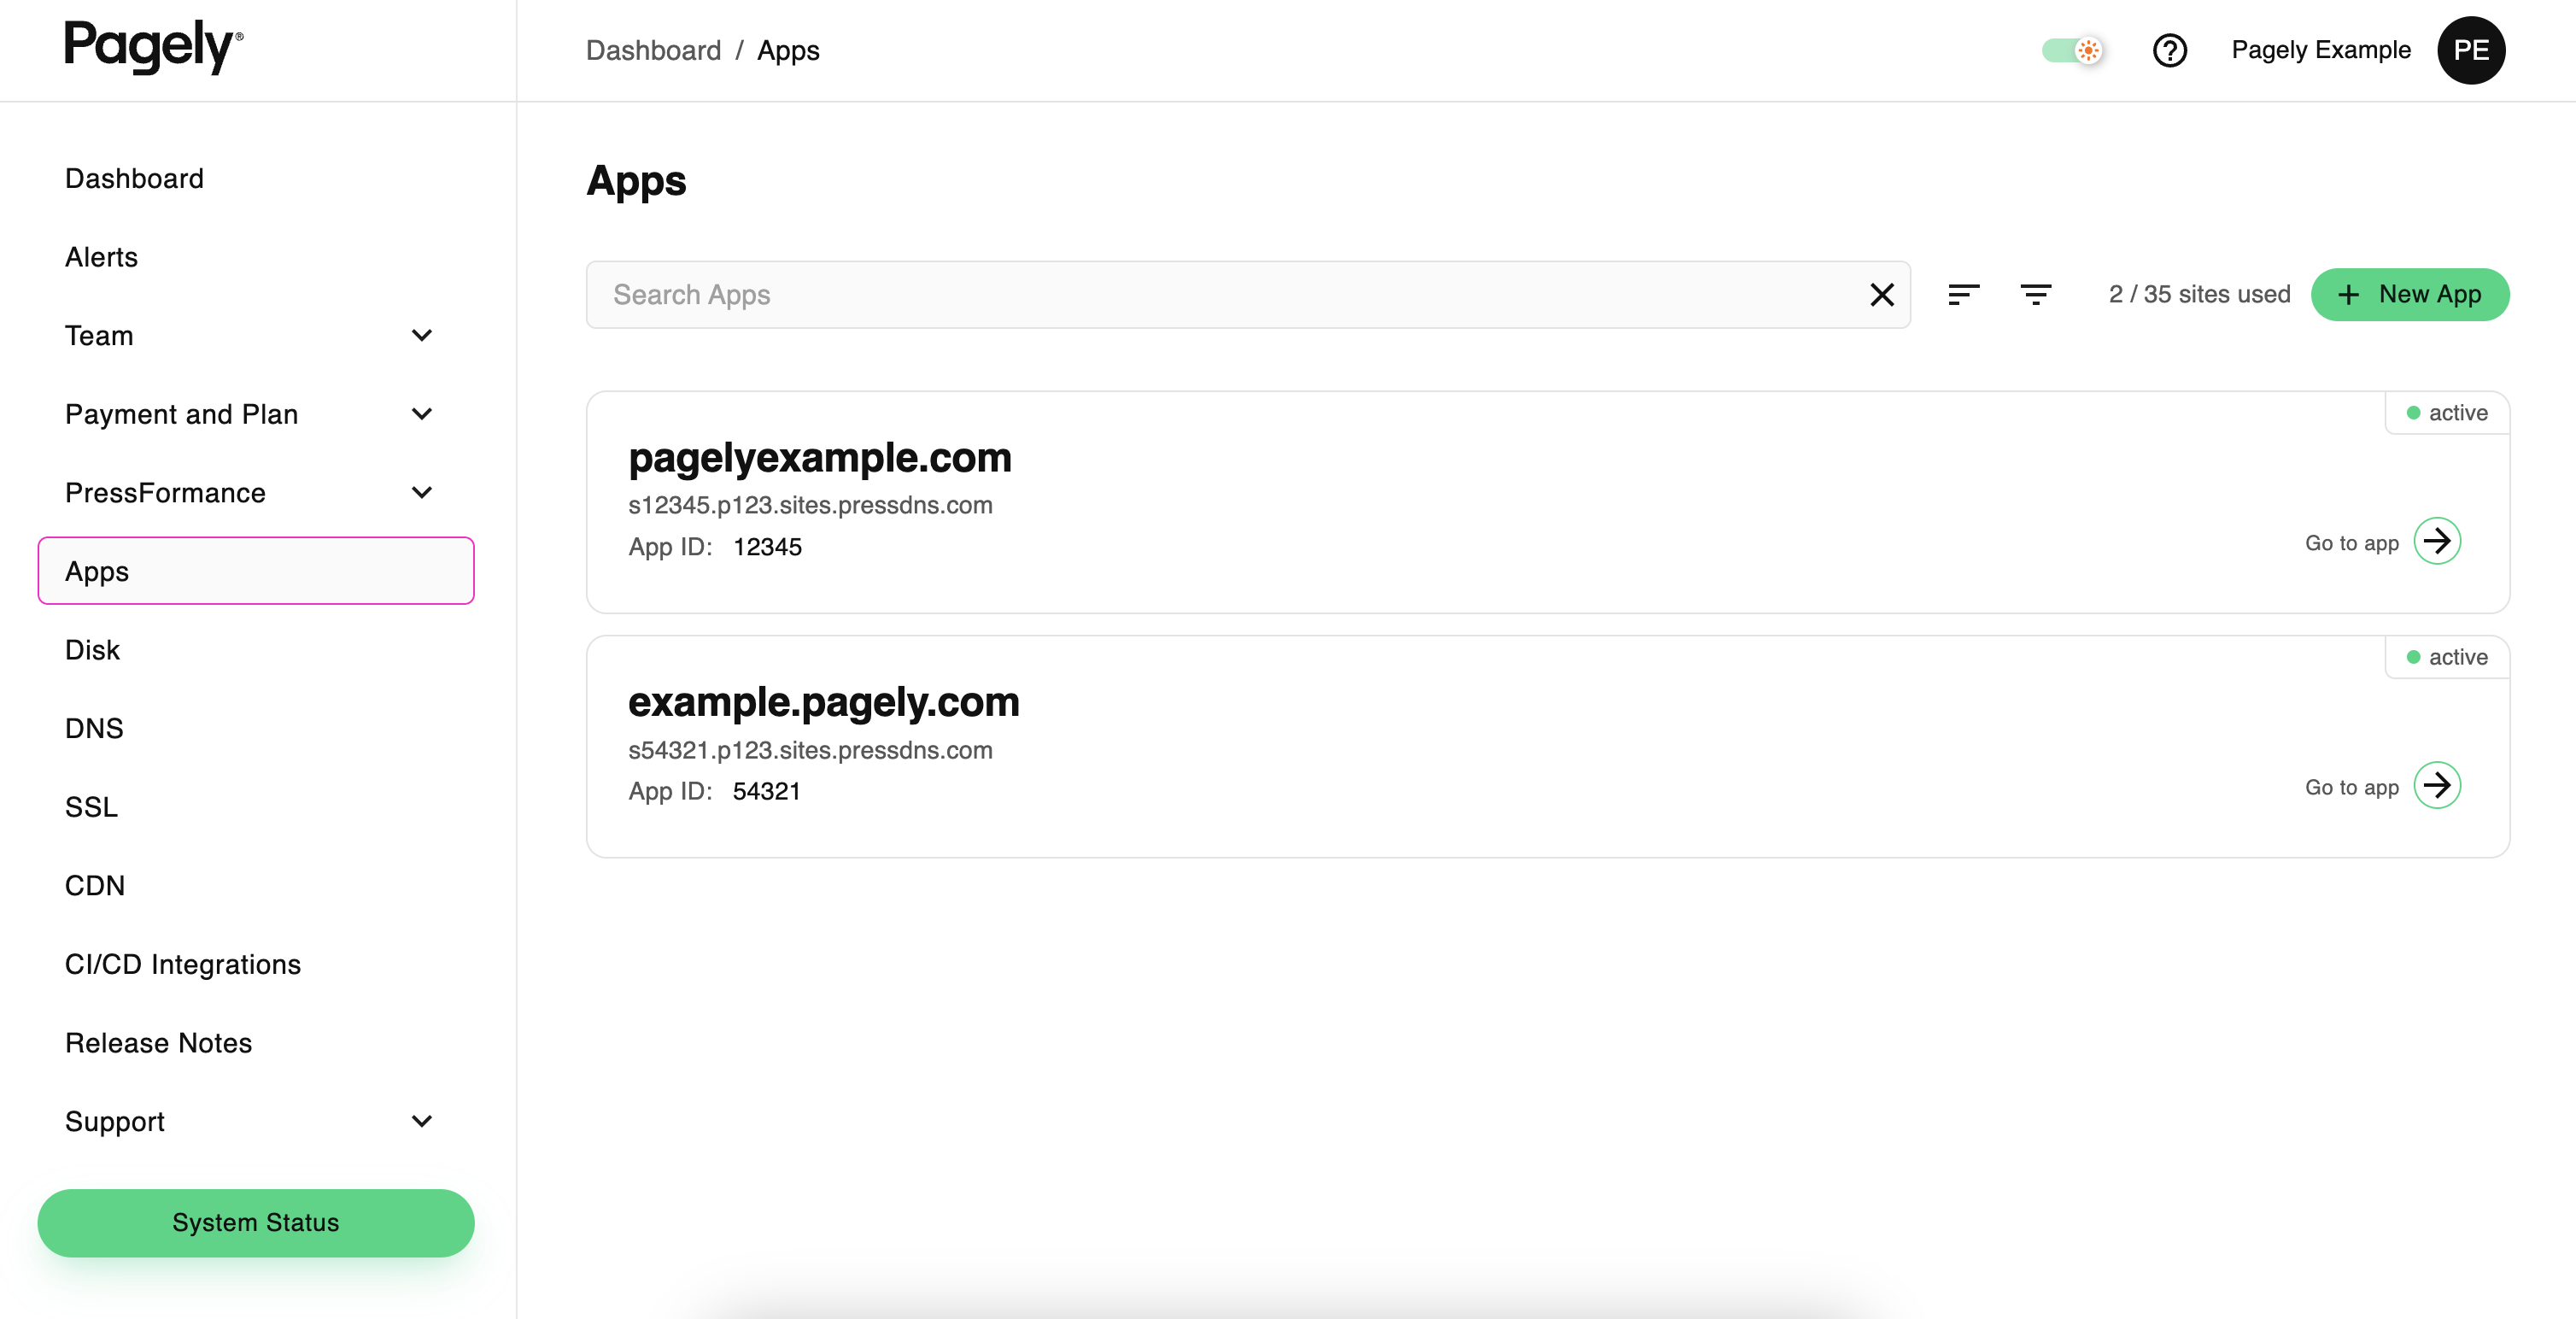
This menu item will take you to a listing of all WordPress apps that are installed on the account.
If you need to create a new WordPress site or make changes to an existing one, you would do so from the Apps section.
DNS
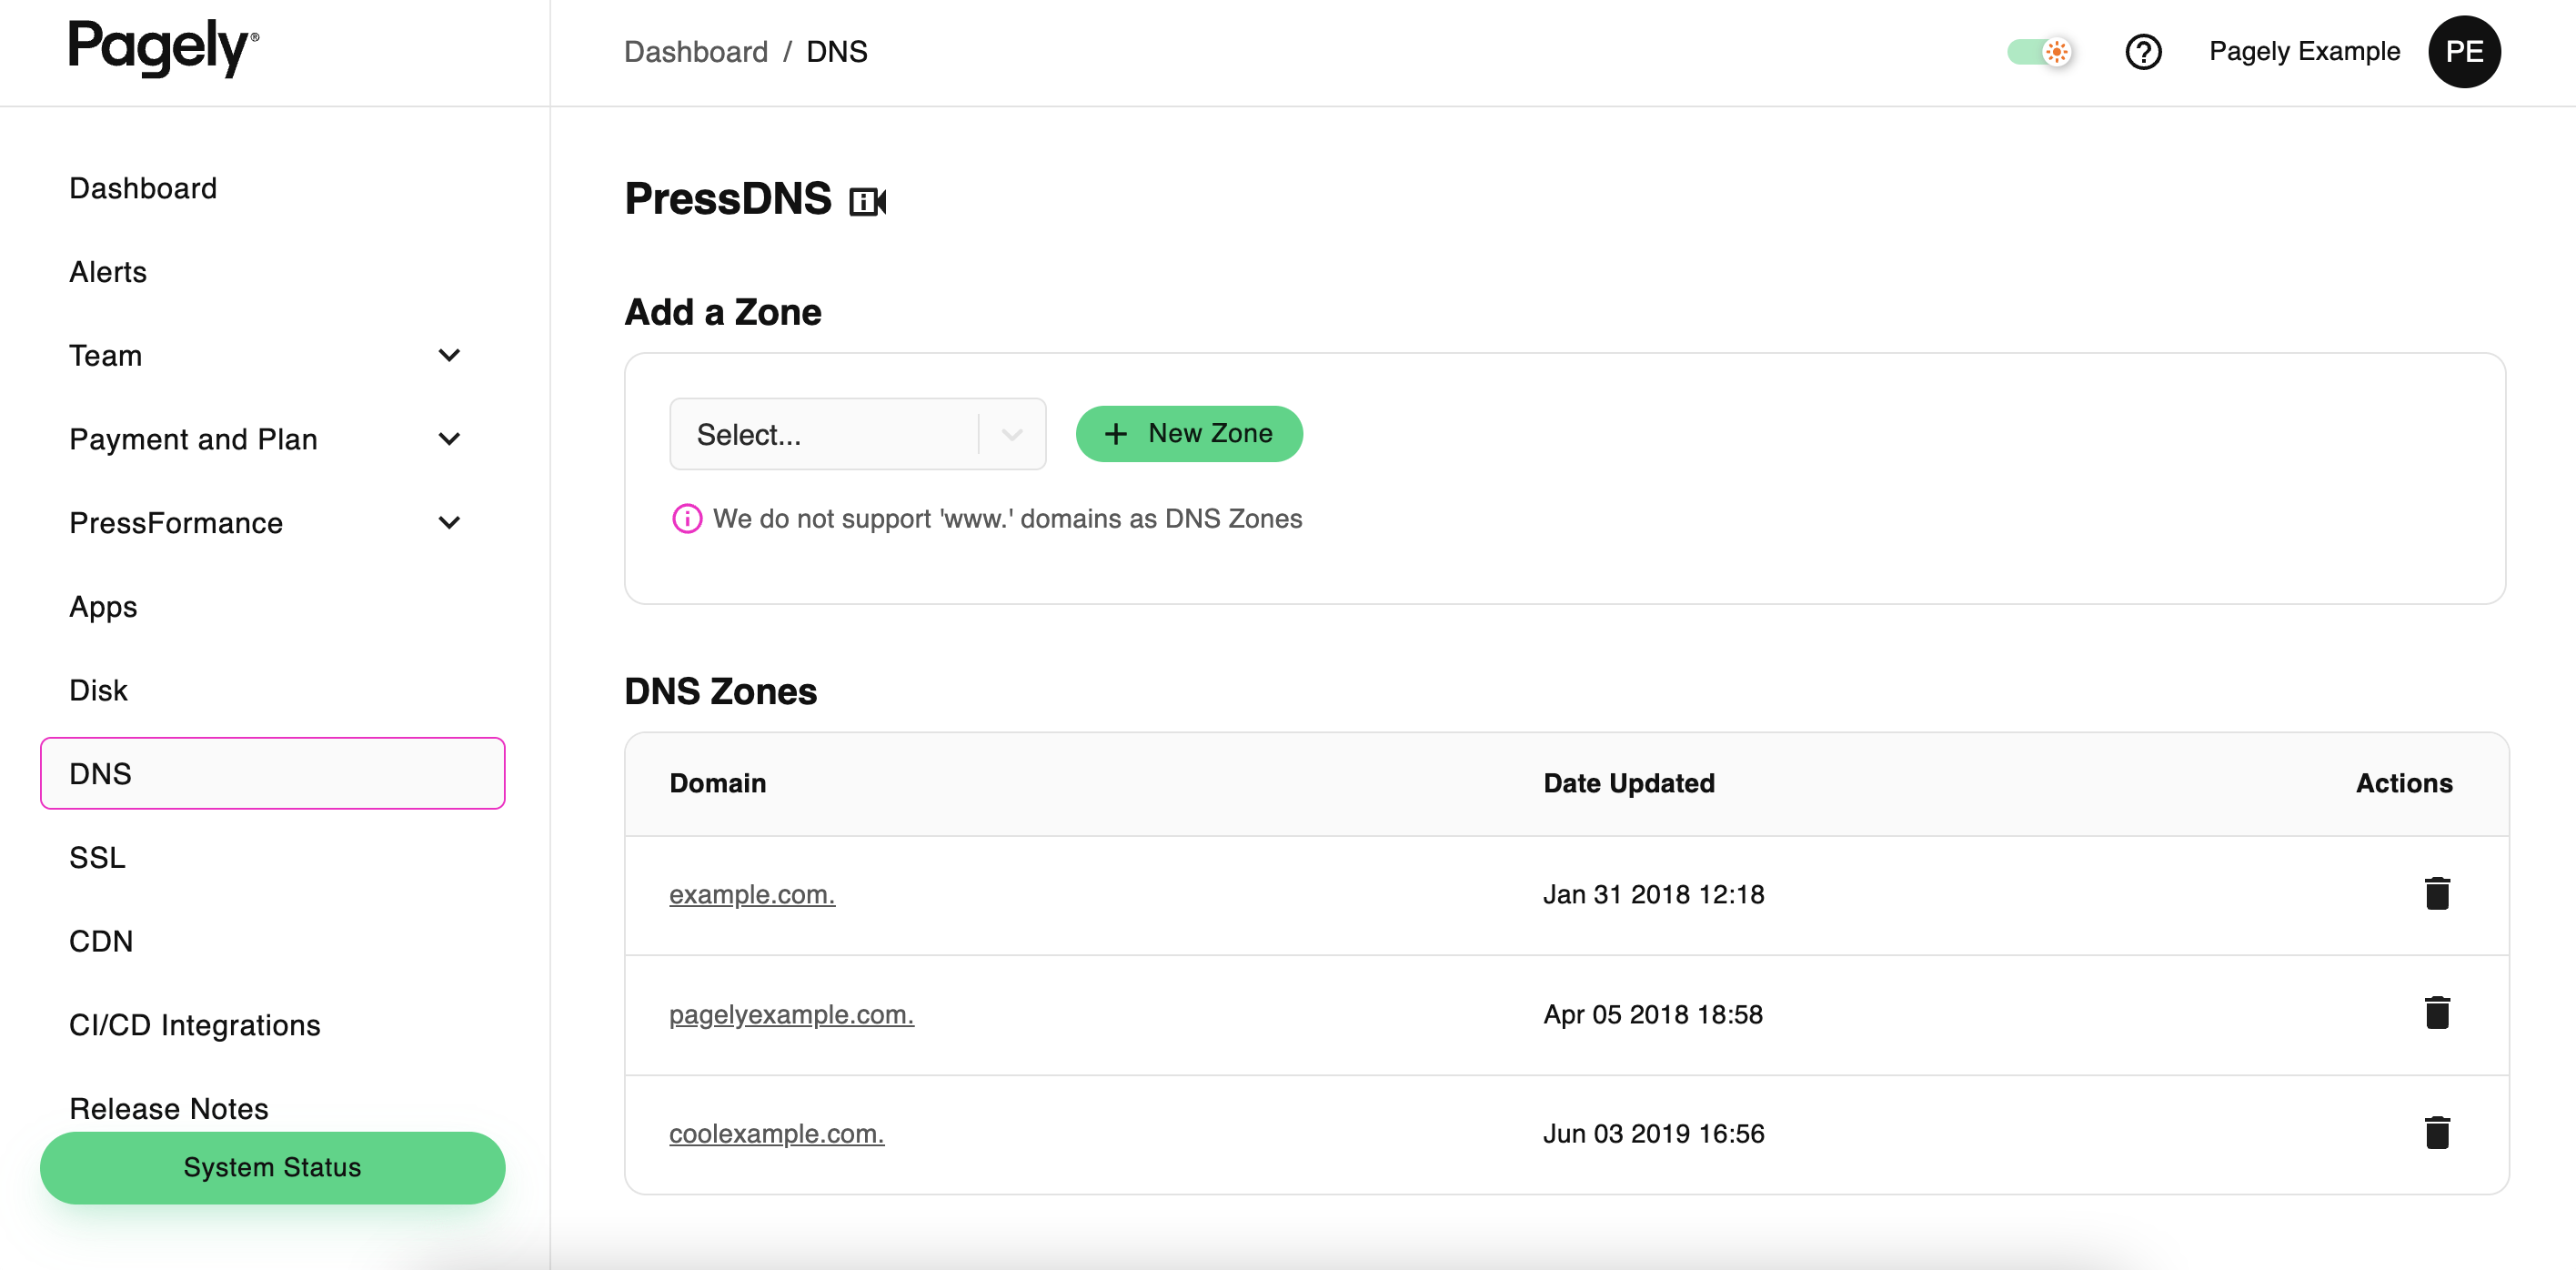
Inside the DNS section, you'll be able to make changes to your domain's DNS records.
SSL
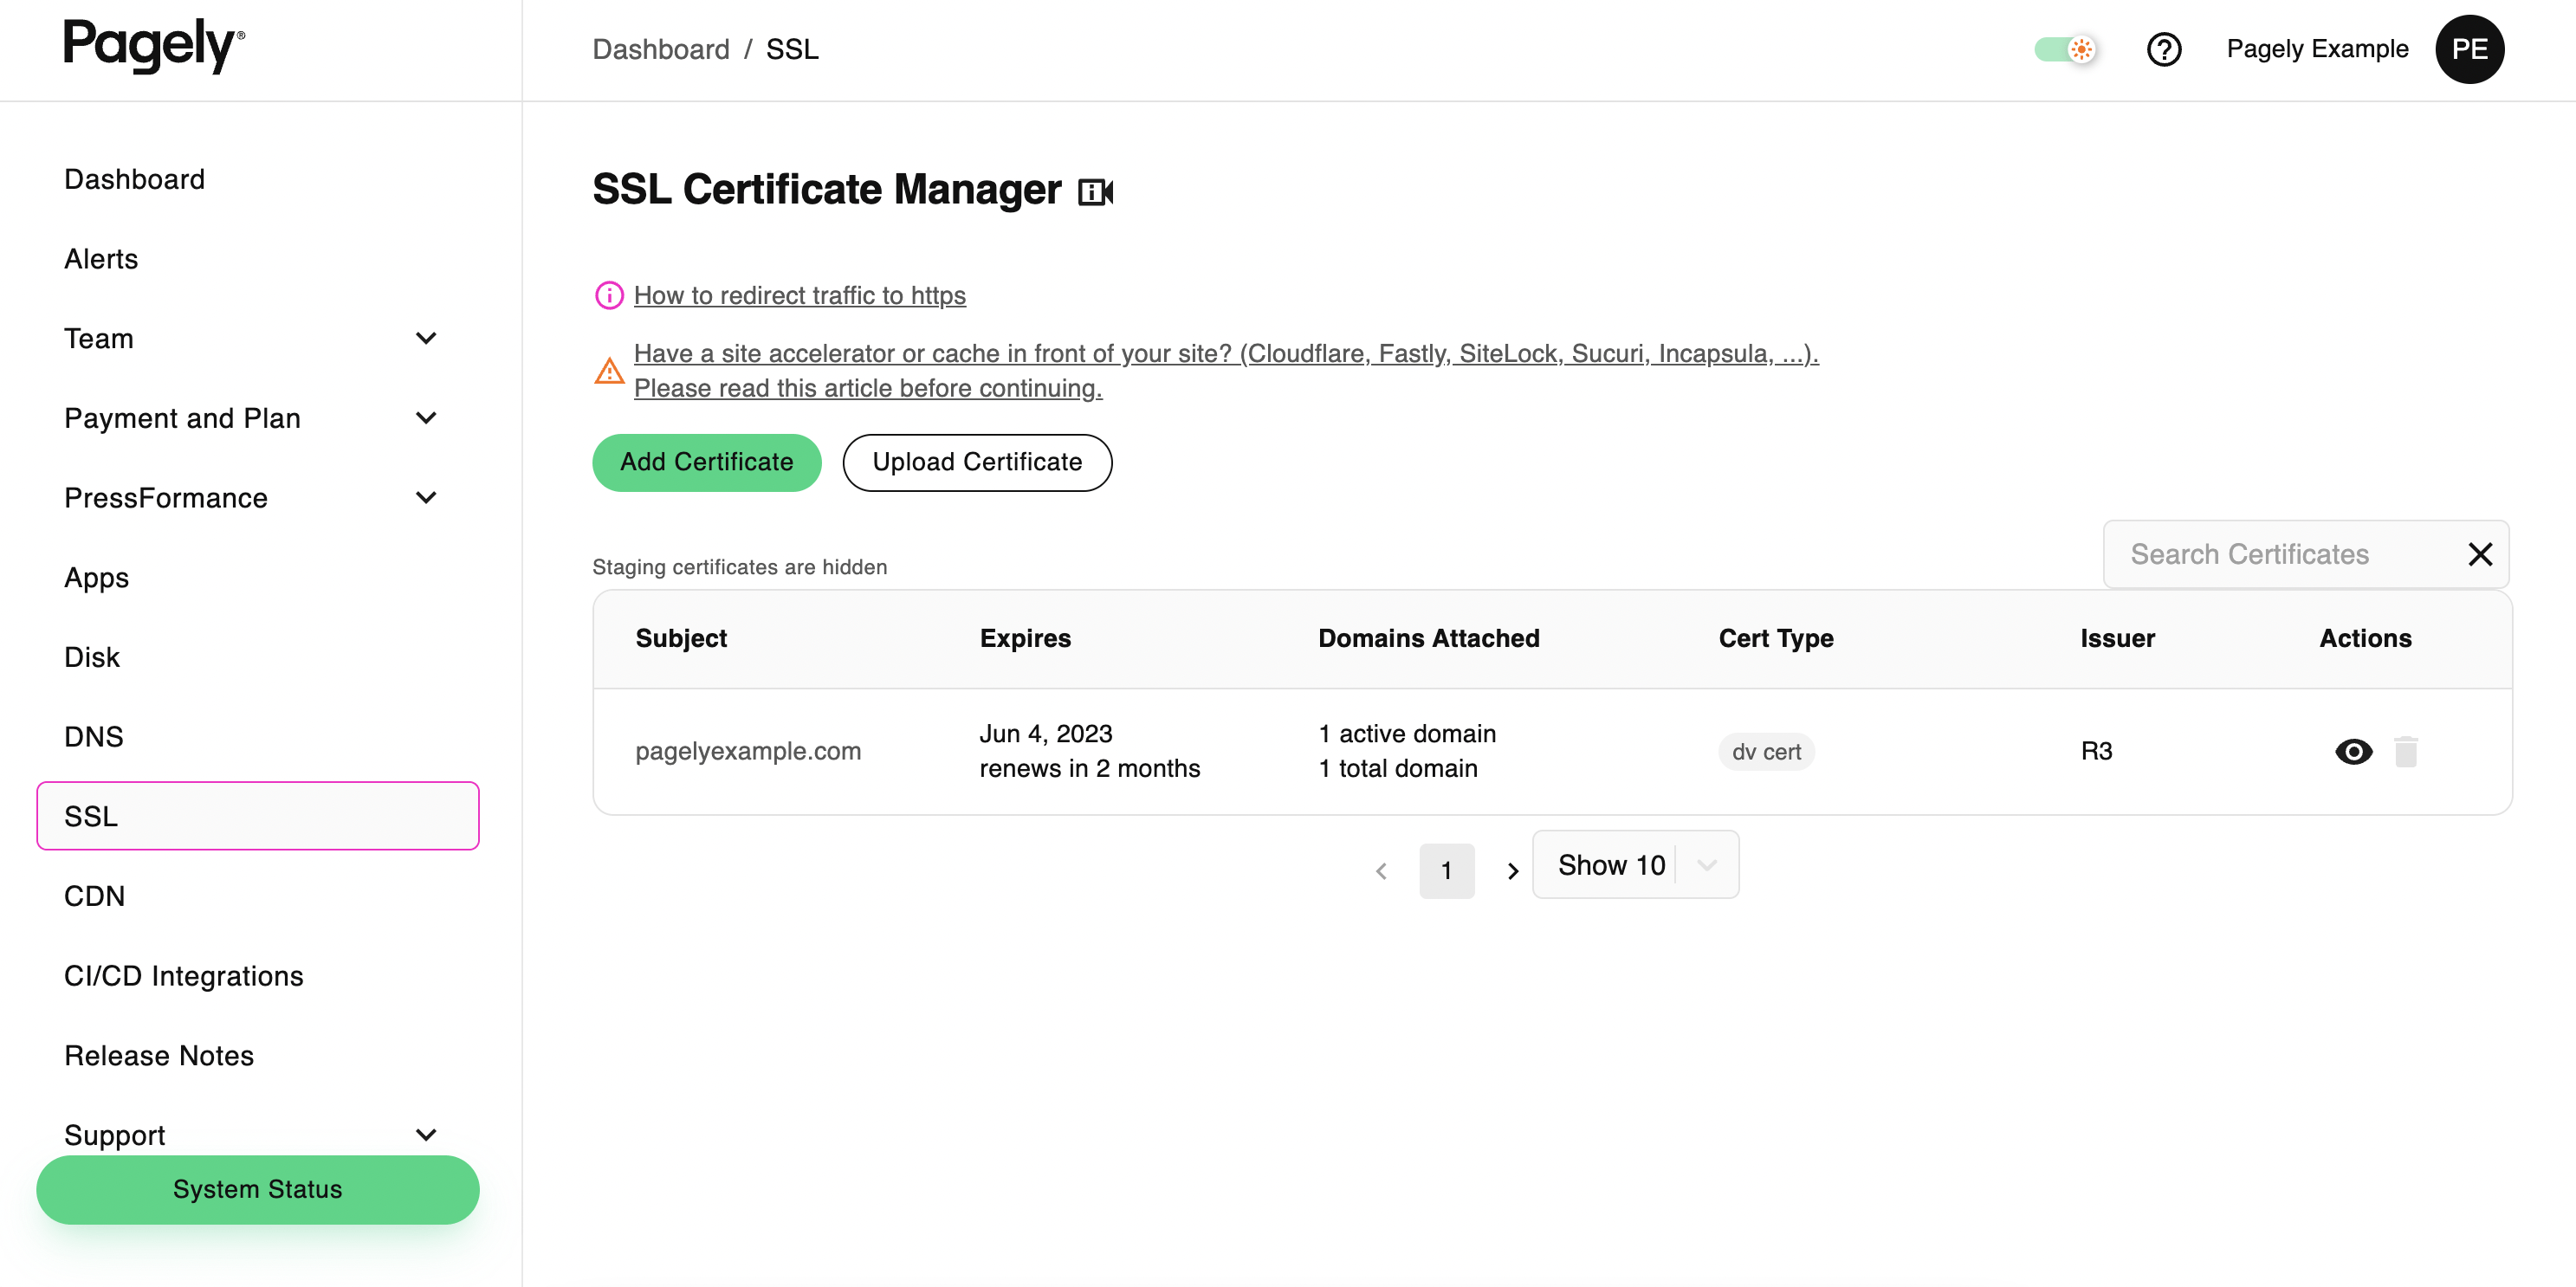
Here, you can manage any SSL certificates on your account. If you need to install an SSL certificate or create a new one using Let's Encrypt, this is where you'd do so.
CDN

Inside the CDN section, you'll be able to view your CDN details as well as purge the CDN cache if you need to.
Inviting Collaborators
If you have multiple users who will need access to your account, you'll want to invite them as collaborators.
Inviting collaborators can be done within the Team section in Atomic. For more complete information on inviting additional team members, see our article on inviting collaborators.
App Creation
One of the first steps you'll want to do is create any sites that you need. At Pagely, we typically refer to those sites as *Apps*
Generally, you'll want to create two apps, one for production and one for development. For more information, see our article on creating apps in Atomic.
Production App
This app will house your main production site that the world sees. To improve stability, you'll only want to deploy changes to this after you've already tested them in your development app.
Development App
Your development app is where you'll make changes before you push them live to production. This ensures that if there are any issues in your code, it won't impact your users accessing your site.
For more information on creating a development app or how it will work into your workflow, see the following articles:
SSH/SFTP Access
When accessing your site to make changes, you'll need SSH or SFTP access. For security purposes, Pagely only allows authentication via SSH keys.
Don't worry, it's not as complicated as it might seem and once configured, it actually simplifies connecting quite a bit. You'll want to follow these steps to configure SSH access:
- Generate an SSH key (Windows|MacOS)
- Add your SSH key to Atomic
- Configure your SSH/SFTP client
Migrating Your WordPress Site
There are various ways to migrate your site to Pagely, but generally it's as simple as copying over your files and database.
Automated Migration Tools
Exporting Databases
Importing Databases
Migrating Files
Development and Deployment Workflows
Most development workflows should look something like this:
- Develop your changes locally.
- Push those changes to a version control system such as Git.
- Automatically deploy to your development environment from Git.
- Check your development environment to make sure everything is working properly after your changes have been made.
- Deploy the changes to your production environment from Git.
Of course, this can change a bit depending on the workflow that works best for you. For more information on development workflows, see our article on responsible WordPress development.